Snowflake

This page is for enabling the Snowflake integration for the first time. If you are an existing Snowflake customer, instead go to Snowflake Migration for Existing Customers.
Requirements
In order to successfully to set up your Snowflake integration, you will need:
- a Snowflake account
- your Snowflake instance URL
- a user with Snowflake admin access
Steps to Complete the Integration
- Head over to the Warehousing setup page.
- Select Snowflake
- Click Connect to Snowflake
From there, you will take the following steps to complete your Snowflake integration:
- Enter your Snowflake instance URL
- Run a query in your Snowflake SQL Editor to create a new database
- Select the schema(s) to sync
1. Enter Snowflake Instance URL
Rockerbox needs your Snowflake account URL in order to setup data warehouse. The URL can be found in your Snowflake console page. It should follow a pattern like:
- https://app.snowflake.com/{your region}/{your identifier}/worksheets

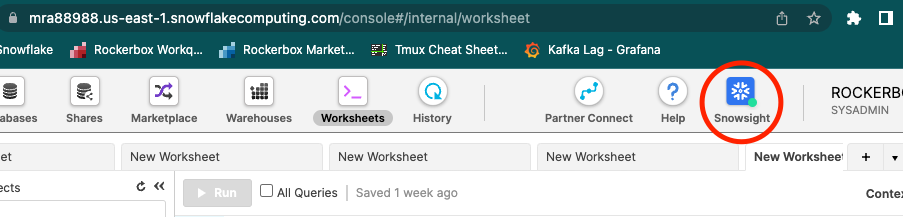
If the URL doesn't follow that pattern, and instead looks like either of the following:
- https://{your identifier}.snowflakecomputing.com/
- https://{your identifier}.{your region}.snowflakecomputing.com/
then you are likely on an older version of the Snowflake UI. Click the Snowsight link as shown in the image below and you should then be able to find a URL that matches the correct pattern.
2. Copy the URL
Copy the URL from the previous step. Then, return to Rockerbox and enter that URL into the Snowflake Instance URL and click Set up my share. If it’s a valid URL, the UI will display the following datapoints:
- Account ID
- Cloud
- Region
3. Create the Rockerbox Database
Note: this step requires an ACCOUNTADMIN role.
The UI will display a query for you to run in the Snowflake SQL Editor. This will create the Rockerbox database
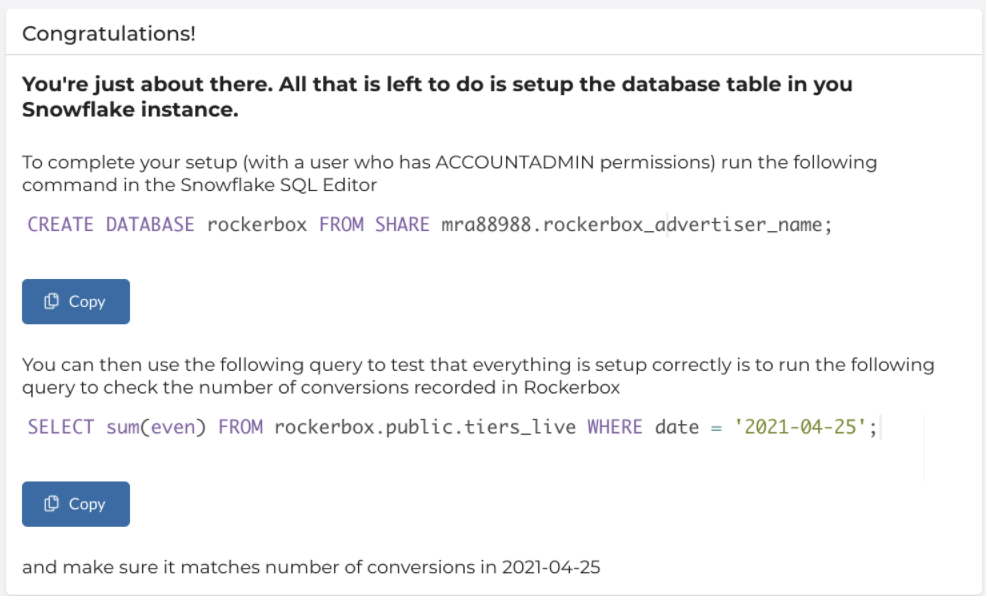
You can replace the rockerbox database with another name. If you already have an existing database named rockerbox, you must use a different name. In any case, do not edit the rest of the query we provide to you.
4. Select the Schema(s) to Share
In this step, you’ll select the Data Schemas you want Rockerbox to share with your Snowflake instance.
- For Platform Data, select the platform(s) you want to sync over. Most clients will select all platforms they’re actively spending on.
- For Rockerbox Data, first select the Conversion, and then the dataset to share. You can select multiple conversion-dataset combinations.
- For both Platform Data and Rockerbox Data, you can update the default Table Name to something more descriptive.
Once you’ve selected each dataset, be sure to click Sync this dataset to begin the share.
Backfilling Historical Data
For Platform Data, no additional steps are required for backfilling. You will be able to see historical data after setting up the share.
For Rockerbox Data and for each Conversion, Rockerbox will sync data back to the First Reporting Date. If you did not set a First Reporting Date for a Conversion, then Rockerbox will sync one day of data.
Note: this backfill may take 24 hours to complete.