Step 2: Redshift Data Warehouse Setup
This page will take you through adding an Inline Policy.
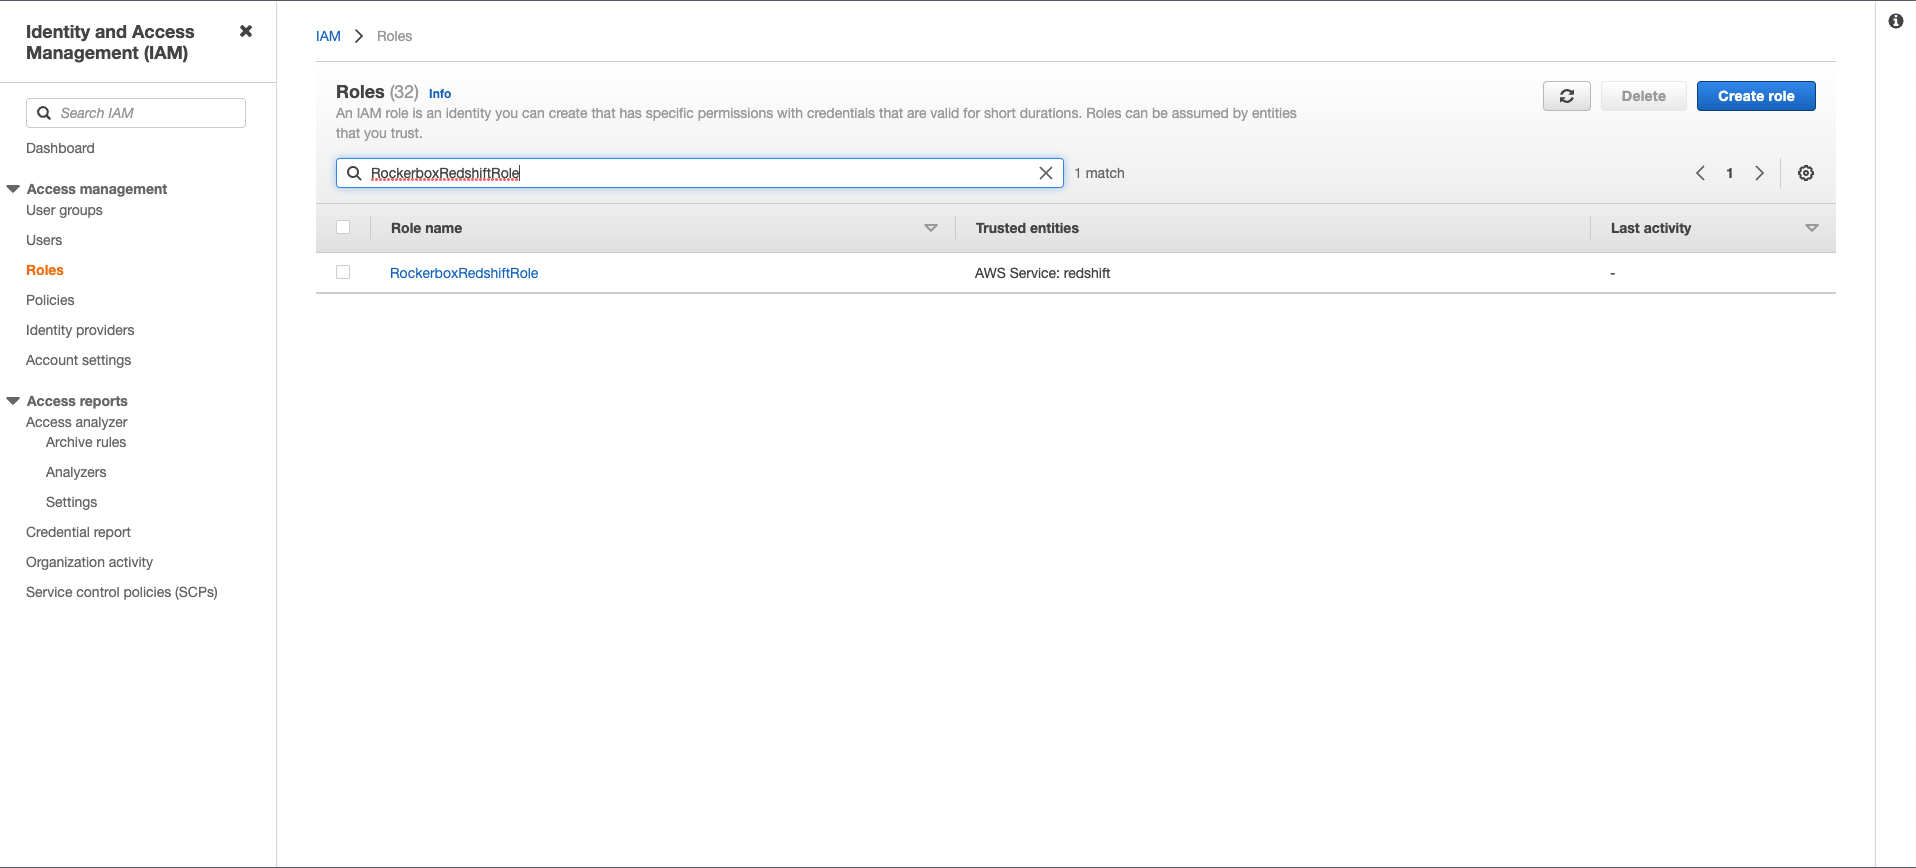
- Find the “RockerboxRedshiftRole” role you previously created in the AWS Roles page and click into it.
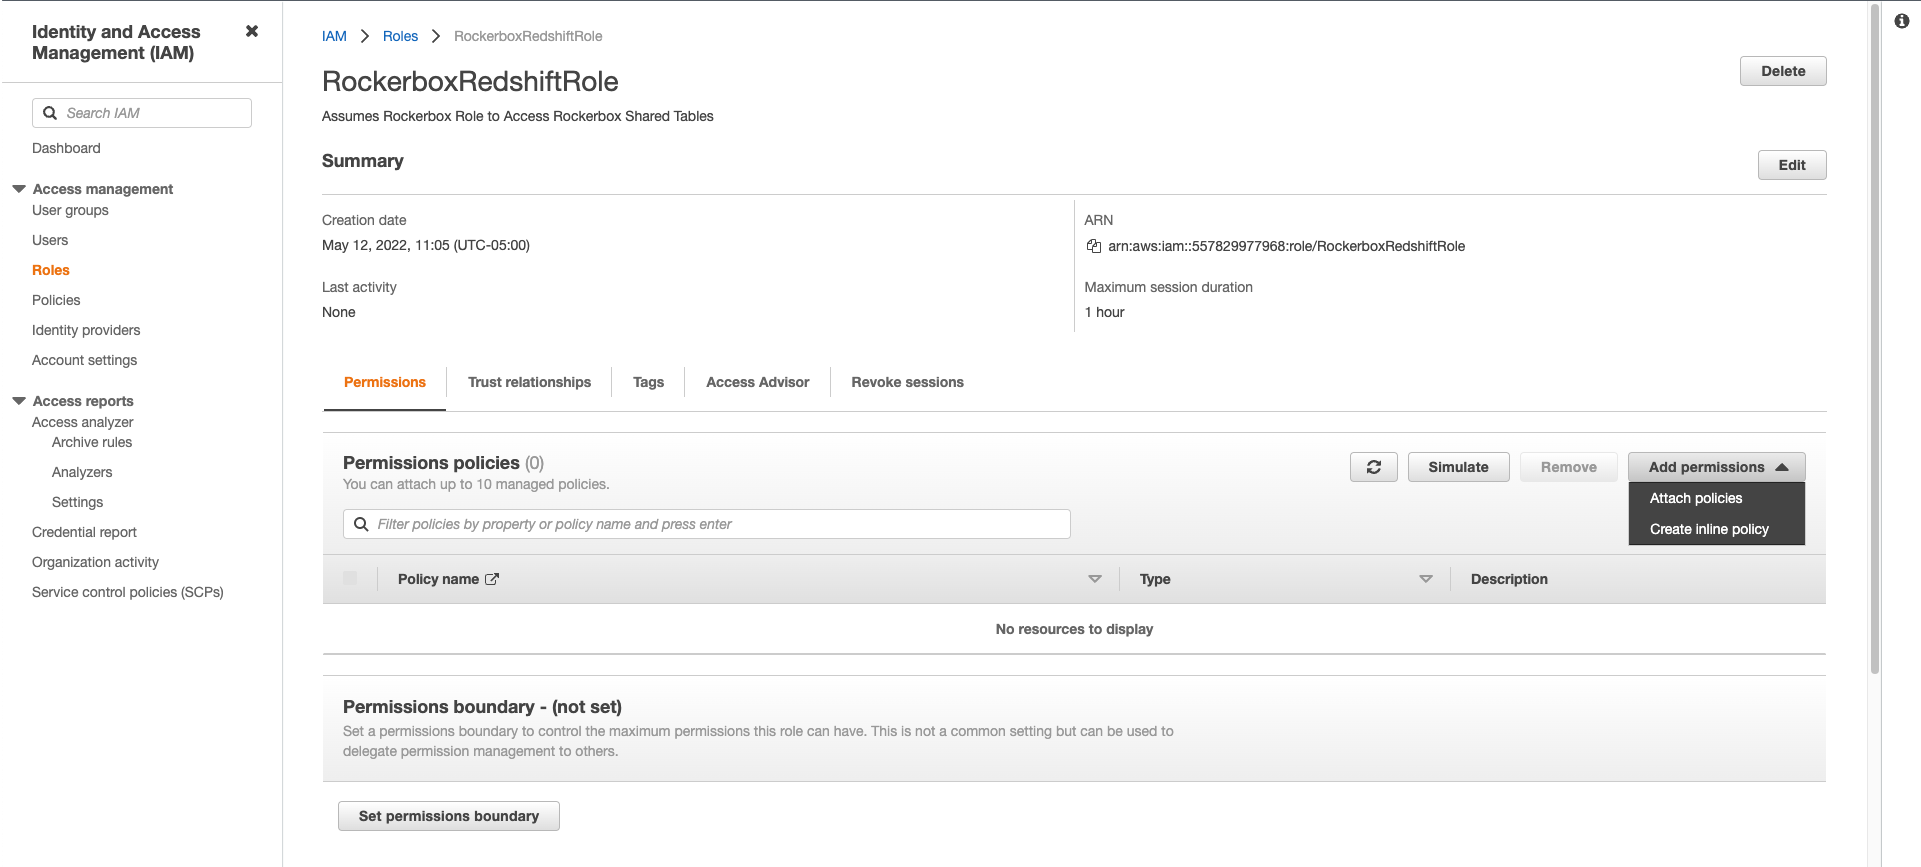
- Click on Add Permissions and select Create Inline Policy.
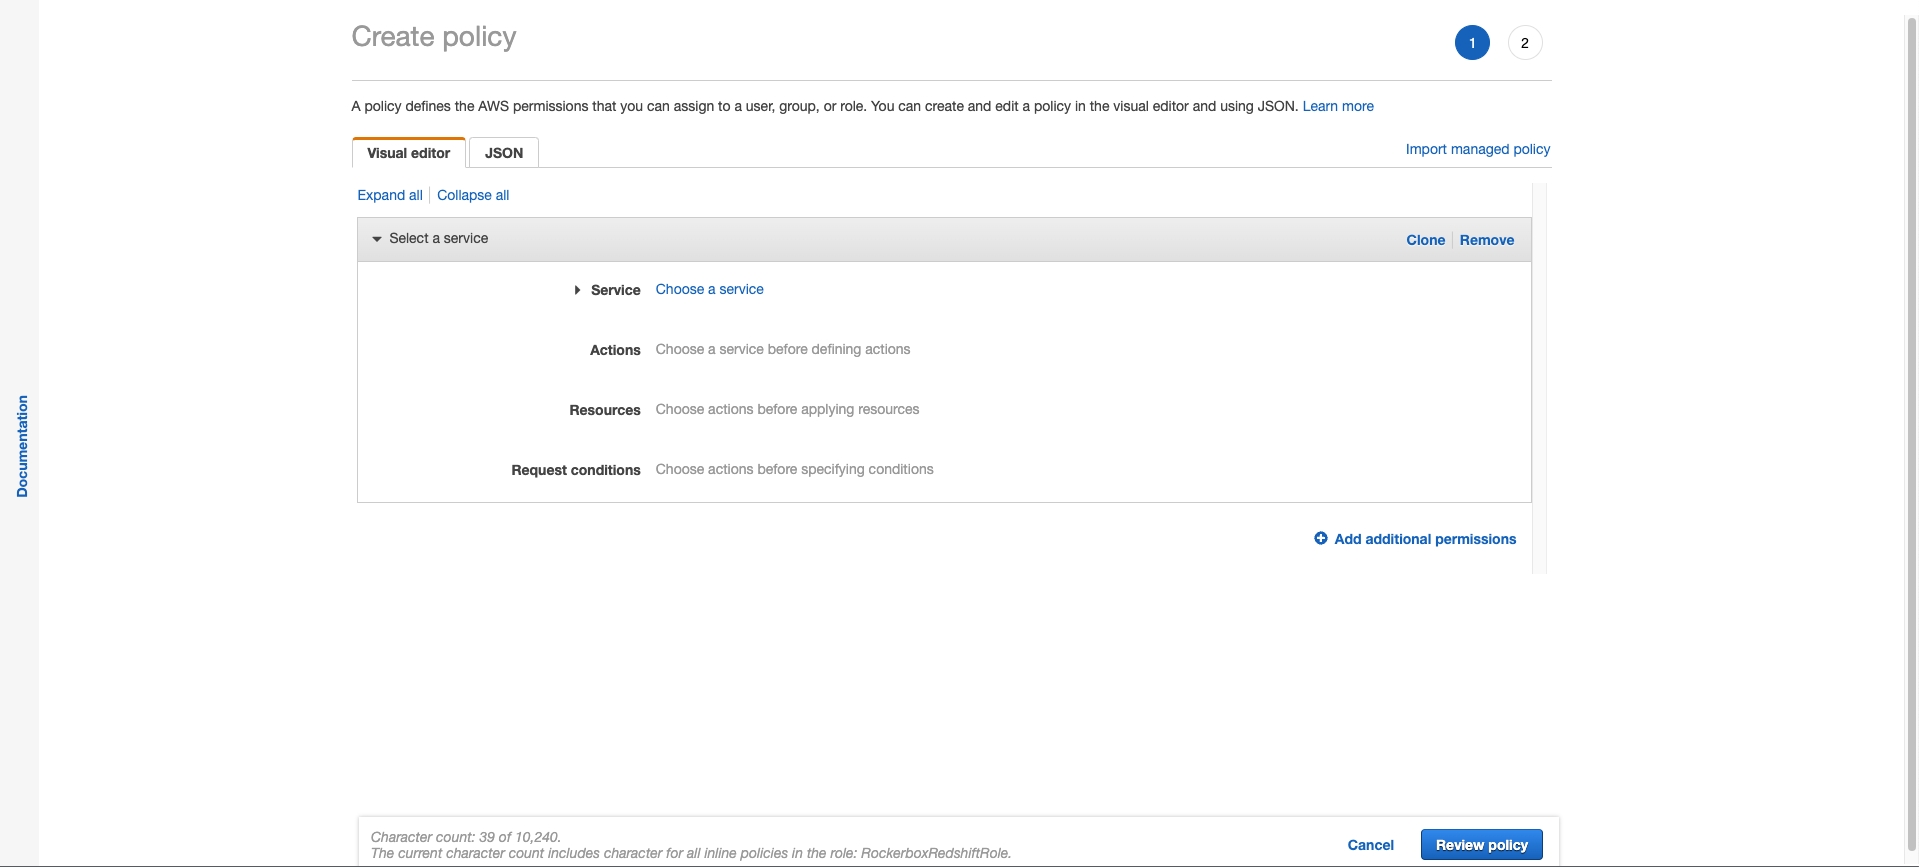
- The default selection on the next screen is “Visual Editor”. Select “JSON” instead.
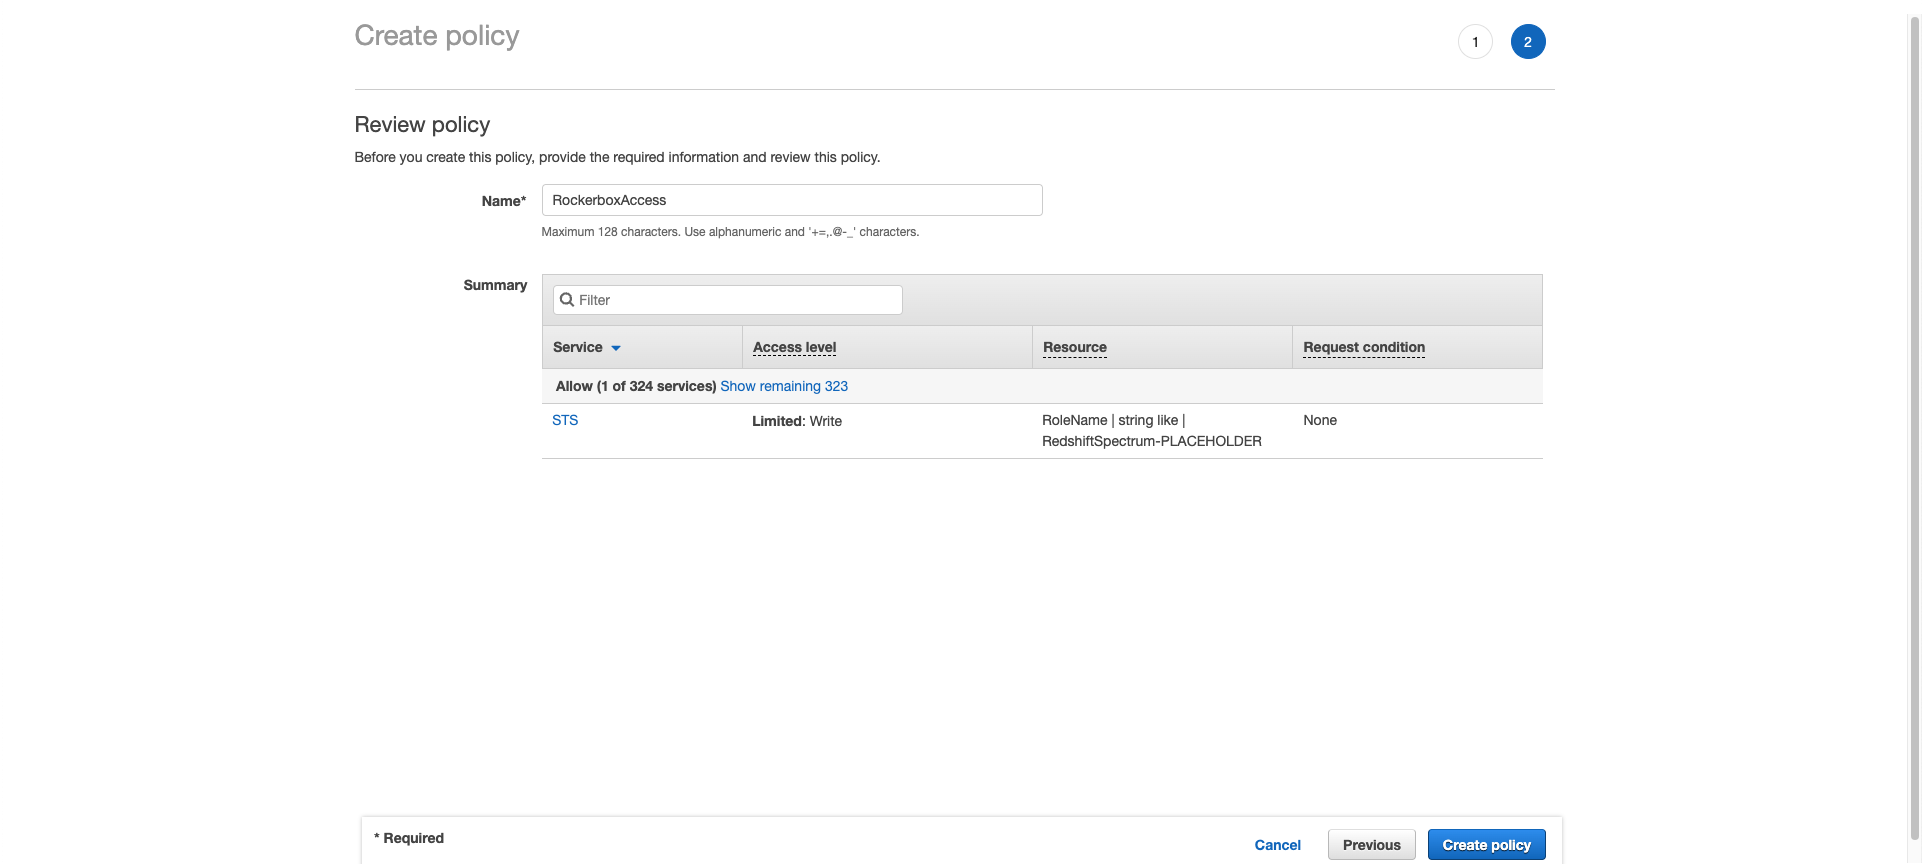
- Copy the Inline Policy displayed on your Redshift Setup UI and paste it into the JSON field and then click “Review Policy”.

- Name this policy “RockerboxAccess” and then click “Create Policy”.