Workaround for Shopify Extensibility Upgrades

Shopify’s Checkout Extensibility updates will impact the ability for the current Rockerbox <> Shopify integration to fire pixels at certain steps in the checkout flow. These pixels are used to tie a customer’s marketing activity to their purchase. Failure of these pixels to fire may cause an increase in your direct (unattributed) conversions.
Rockerbox is aware of these changes and is actively working to update our Shopify integration to fire all pixels within Checkout Extensibility well before August. However, we understand that some brands may want to move to Checkout Extensibility before Rockerbox has updated our native integration.
If your brand is choosing to move the Thank You/Order Confirmation/Order Status pages over to Checkout Extensibility in Q1/Q2 of 2024, then you need to manually implement 1 pixel via a tag manager to continue Rockerbox’s ability to attribute conversions back to touchpoints.
What You'll Need
- Access to your Shopify account and permission to create a Custom Pixel.
- A tag system installed on the Checkout page (Google Tag Manager)
- Purchasers’ email available as a variable in the data layer
If your site does not have Google Tag Manager installed, please reach out to support@rockerbox.com for help with next steps.
What to Implement
Shopify Setup
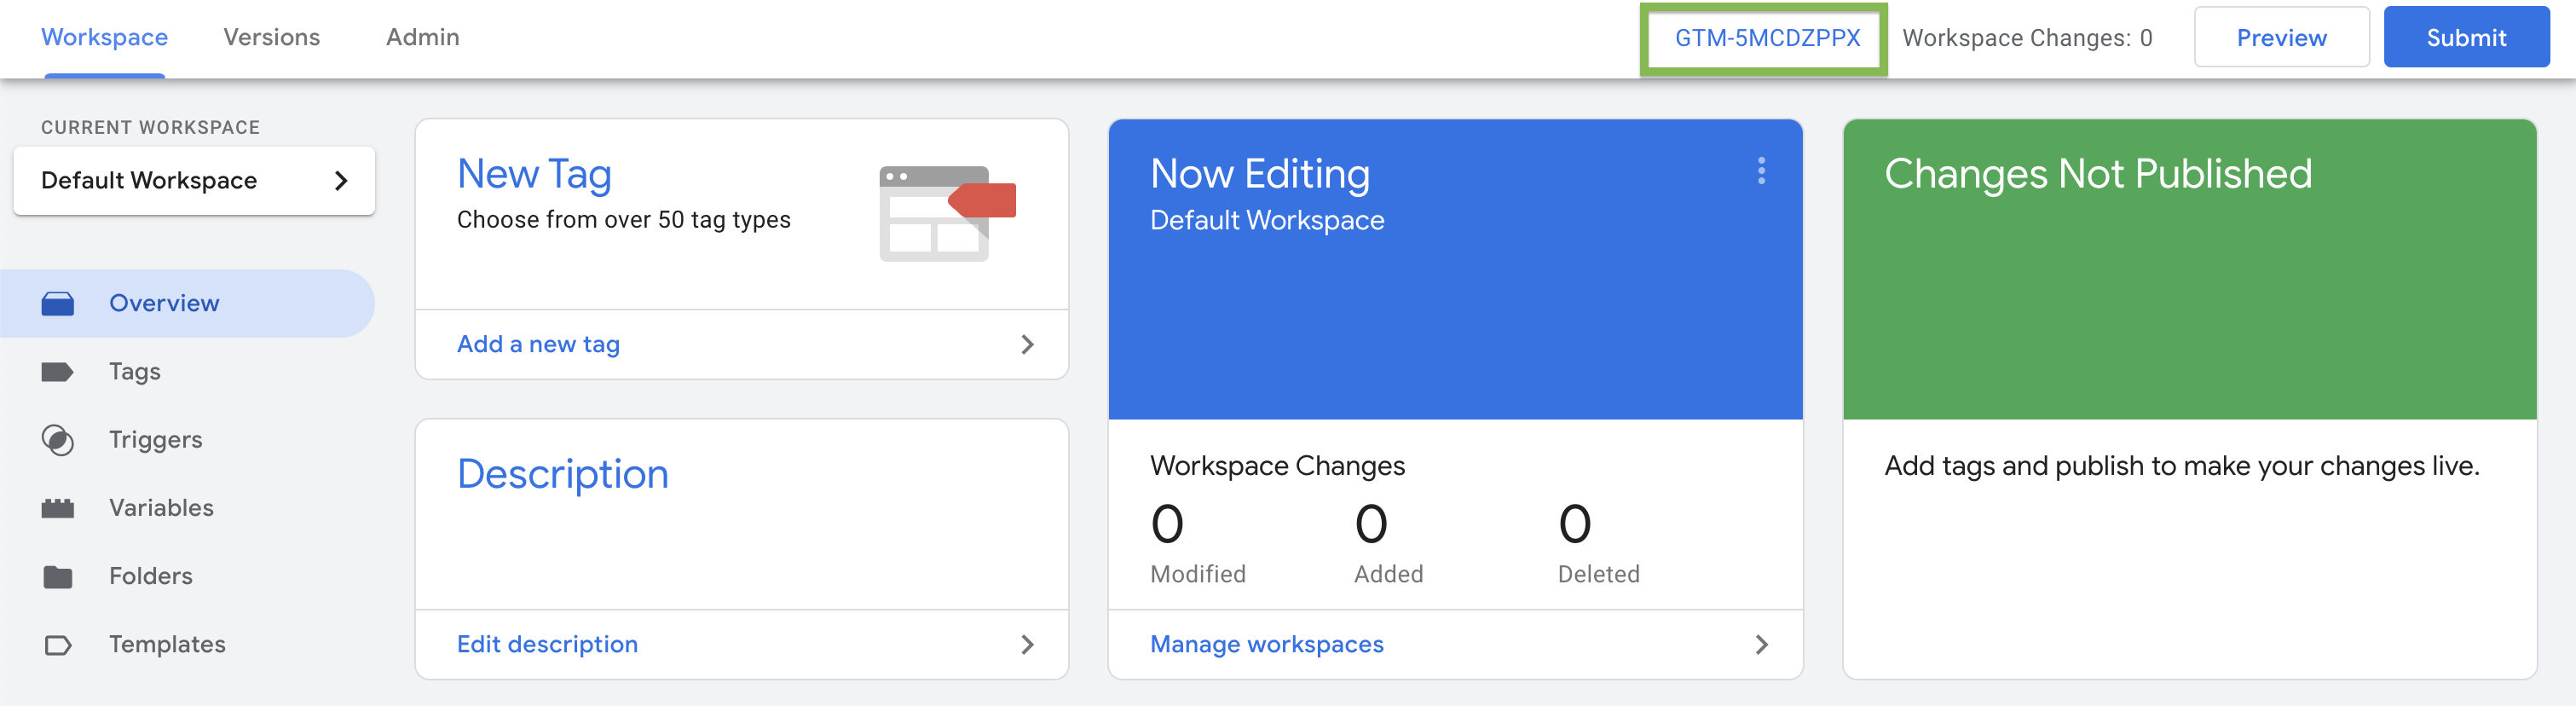
- Find the Google Tag Manager installation code by logging into Google Tag Manager and clicking the Google Tag Manager container ID.
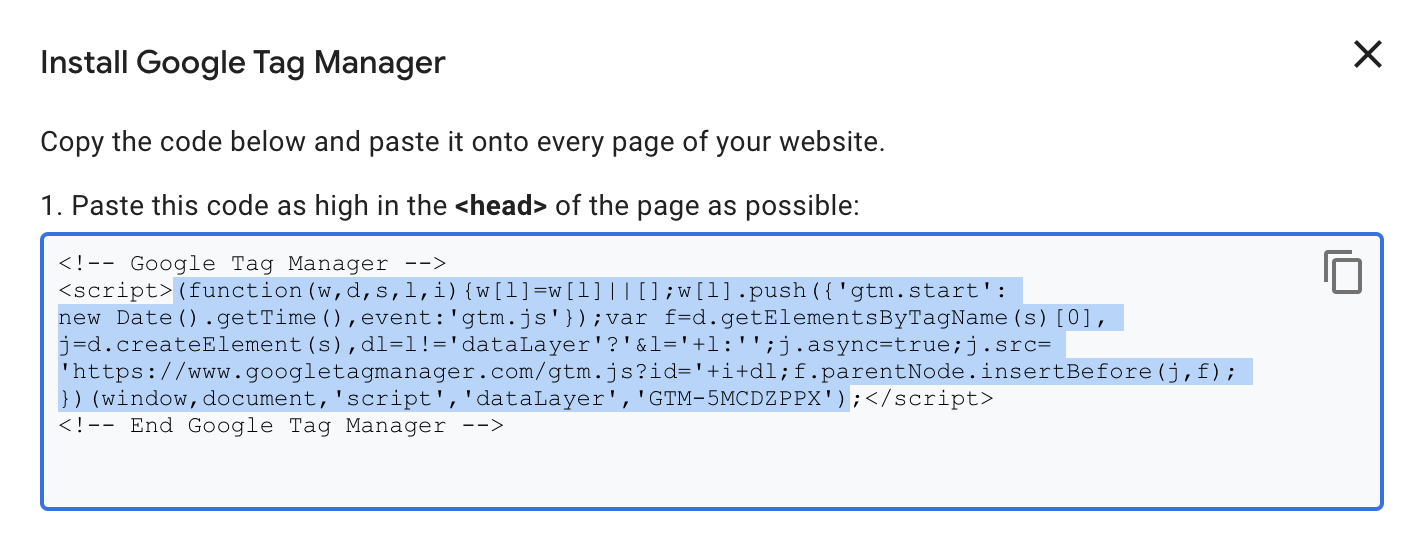
- Copy the code inside the <script> tags from the head section only.
- Login to your Shopify account, click "Settings" in the bottom left corner and then select "Customer Events" from the side navigation.
- Click "Add Custom Pixel" button in top right corner of the page. Enter a name in the text field.

- Clear out the text editor and paste the Google Tag Manager installation code from Step 2, into the Shopify Editor.
- Be sure that you removed all HTML, including the opening comment, the opening script tag, the end script tag and the closing comment.
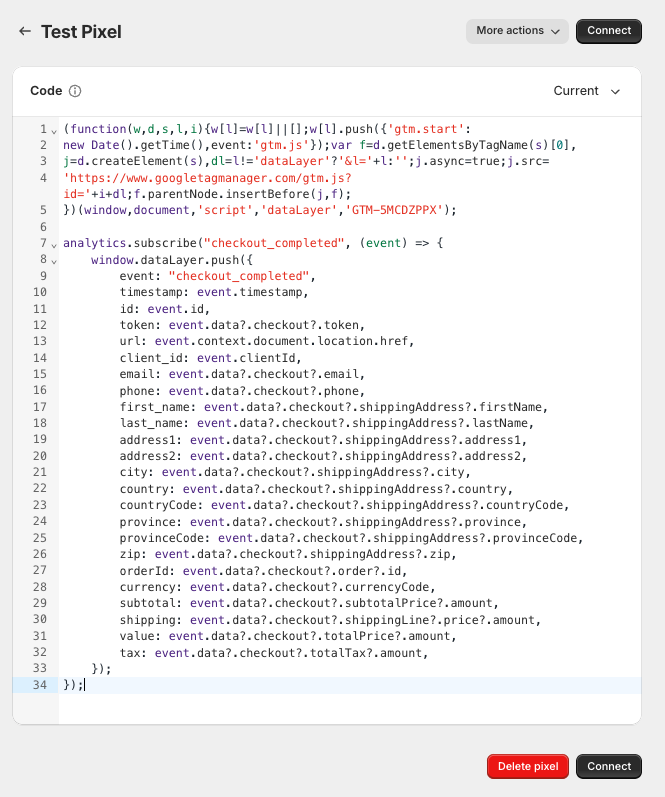
- You need to add in the list of events of that you'll want to subscribe to. In order for the Rockerbox tag to fire correctly, you need only the Checkout Completed event.
analytics.subscribe("checkout_completed", (event) => {
    window.dataLayer.push({
        event: "checkout_completed",
        timestamp: event.timestamp,
        id: event.id,
        token: event.data?.checkout?.token,
        url: event.context.document.location.href,
        client_id: event.clientId,
        email: event.data?.checkout?.email,
        phone: event.data?.checkout?.phone,
        first_name: event.data?.checkout?.shippingAddress?.firstName,
        last_name: event.data?.checkout?.shippingAddress?.lastName,
        address1: event.data?.checkout?.shippingAddress?.address1,
        address2: event.data?.checkout?.shippingAddress?.address2,
        city: event.data?.checkout?.shippingAddress?.city,
        country: event.data?.checkout?.shippingAddress?.country,
        countryCode: event.data?.checkout?.shippingAddress?.countryCode,
        province: event.data?.checkout?.shippingAddress?.province,
        provinceCode: event.data?.checkout?.shippingAddress?.provinceCode,
        zip: event.data?.checkout?.shippingAddress?.zip,
        orderId: event.data?.checkout?.order?.id,
        currency: event.data?.checkout?.currencyCode,
        subtotal: event.data?.checkout?.subtotalPrice?.amount,
        shipping: event.data?.checkout?.shippingLine?.price?.amount,
        value: event.data?.checkout?.totalPrice?.amount,
        tax: event.data?.checkout?.totalTax?.amount,
    });
}); - The completed pixel should look as follows. Click "Save" in the top right corner and then Click "Connect".
Google Tag Manager Configuration
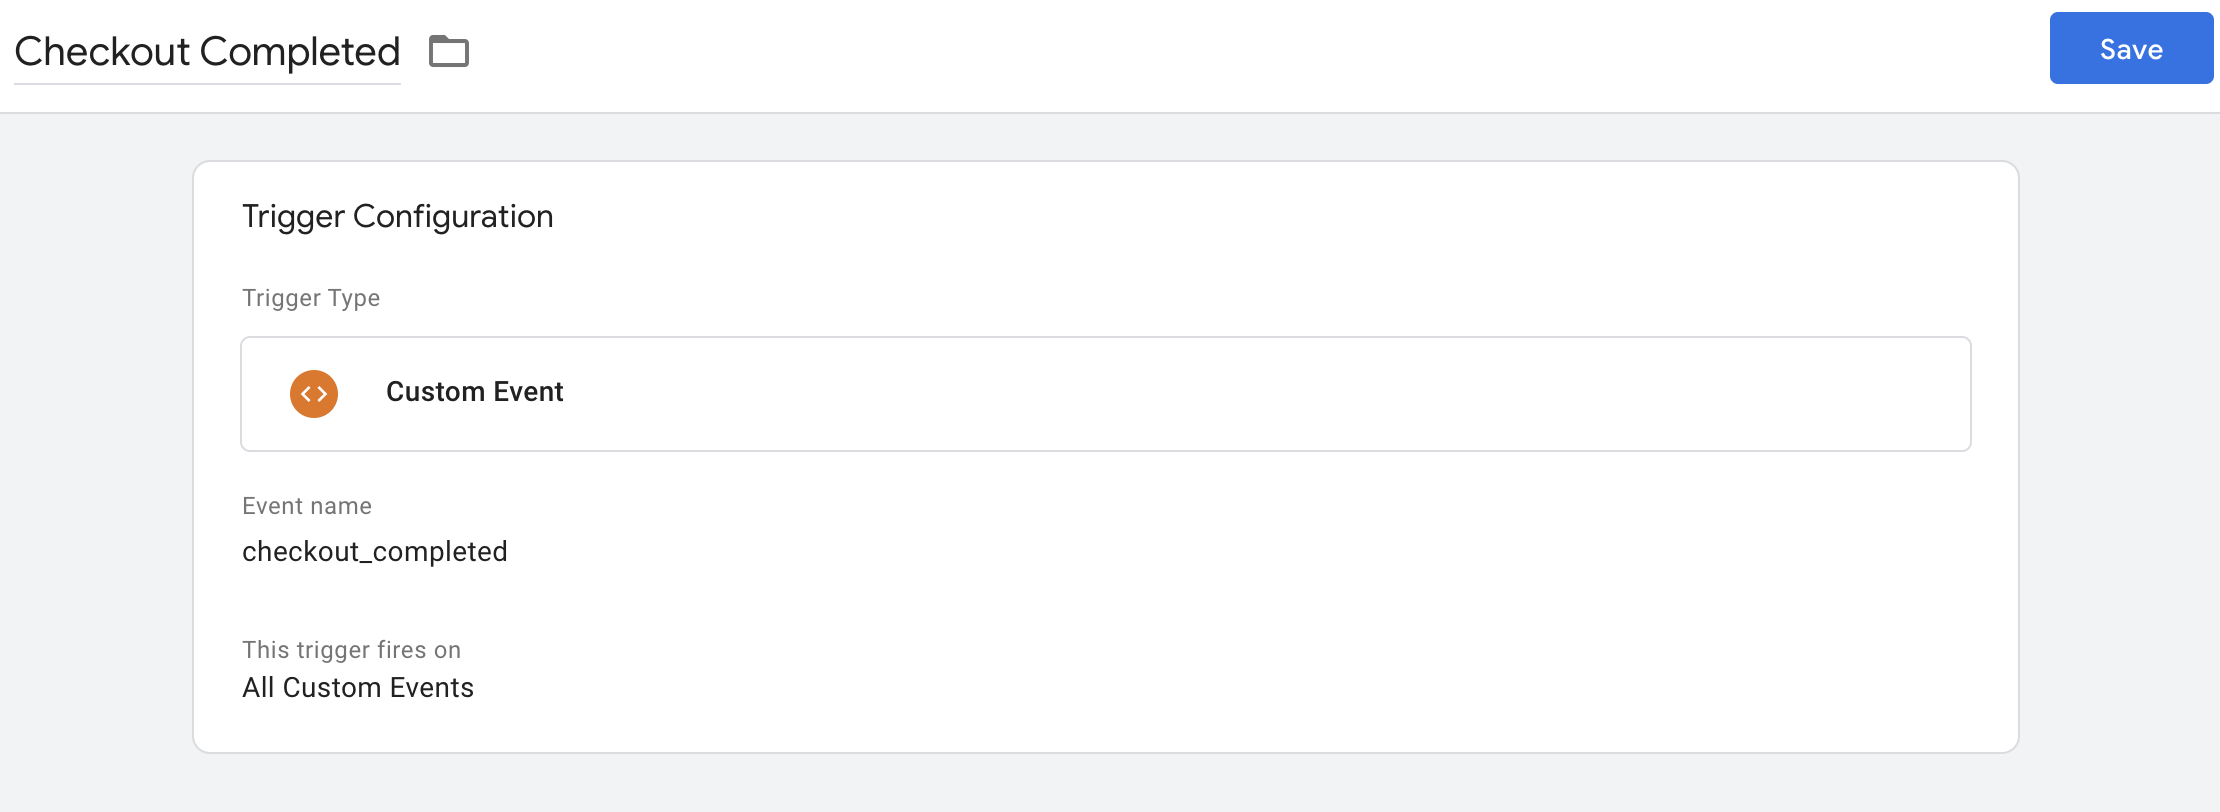
- Create a custom trigger in Google Tag Manager. Select "Triggers" from the left-side nav, click "New". Name your Trigger and set the "Trigger Type" to "Custom Event". Enter checkout_completed in the Event Name Field and click "Save"
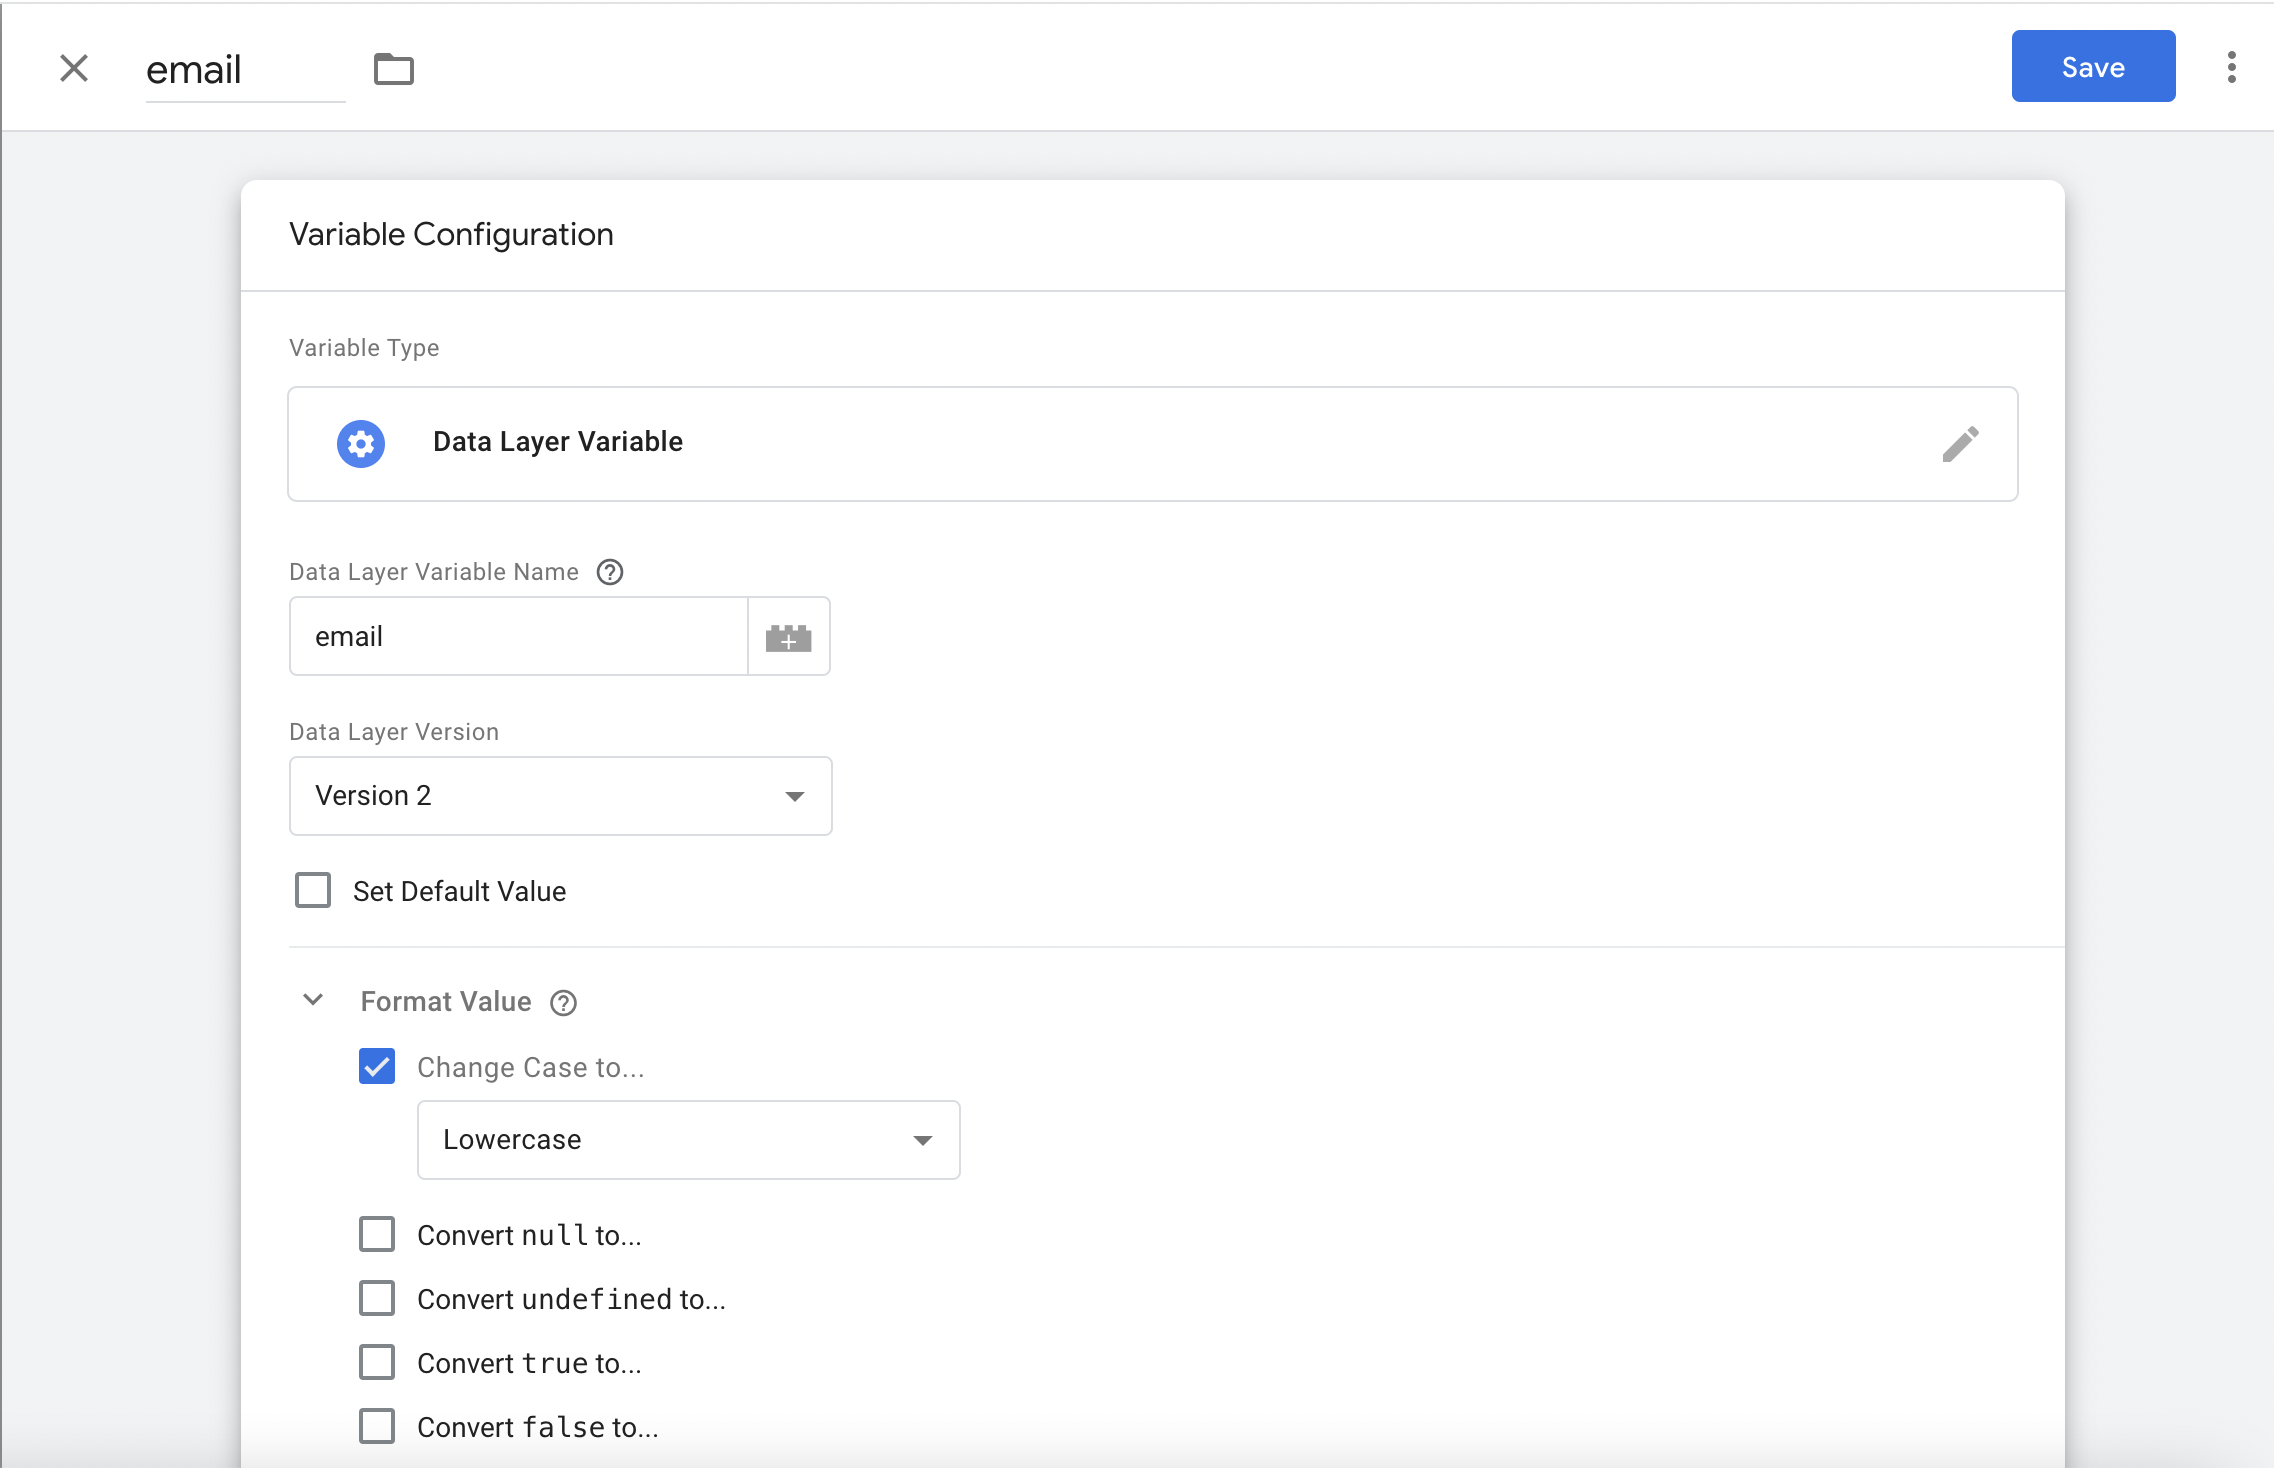
- Create a new "User Defined Variable" by clicking "Variables" from the left side nav. Select "New" from the User Defined Variables" section. Name it email. Set the Variable type to "Data Layer Variable" and enter email into the Data Layer Variable Name field.
- Go to the Google Tag Manager Template Gallery and search for Rockerbox. Click Add to Workspace in the top right corner to install the template in your GTM container.
- Navigate to Settings>Domains to identify your custom tracking domain near the top of the page (required for step #4)

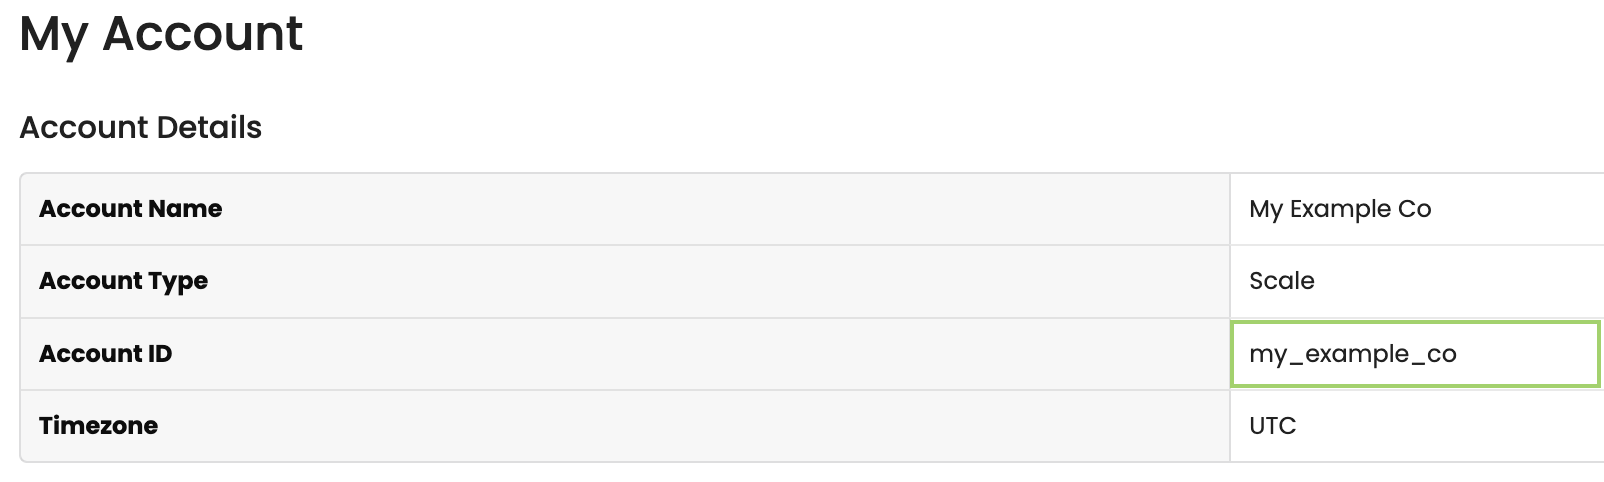
- Navigate to Settings>My Account to identify your account ID (required for step #4)
- Navigate to Google Tag Manager - please ensure you are logged into the appropriate GTM container for your website.
- Within your Google Tag Manager Container, go to Tags and select New
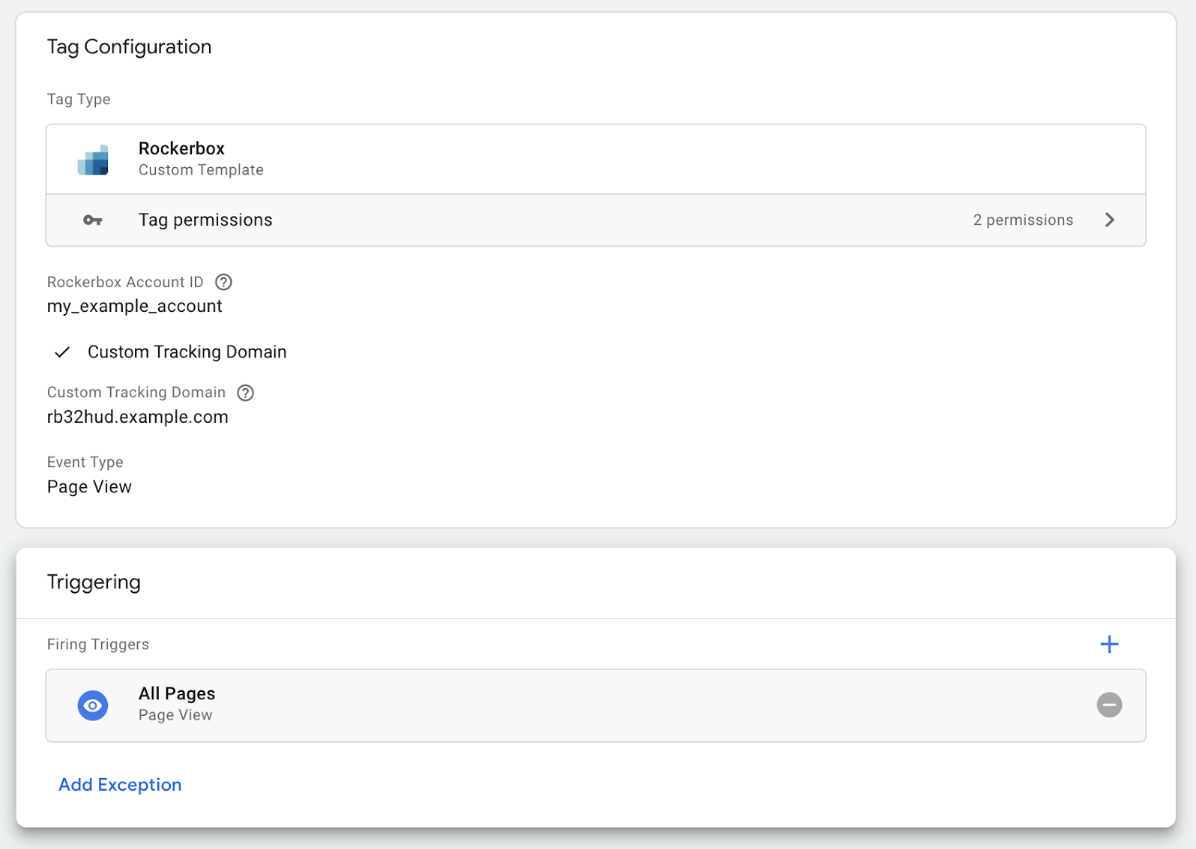
- Under Tag Configuration, select the Rockerbox tag type - this is where you’ll enter the custom tracking domain & account ID from steps 2 & 3 - your tag configuration should look similar to the below:
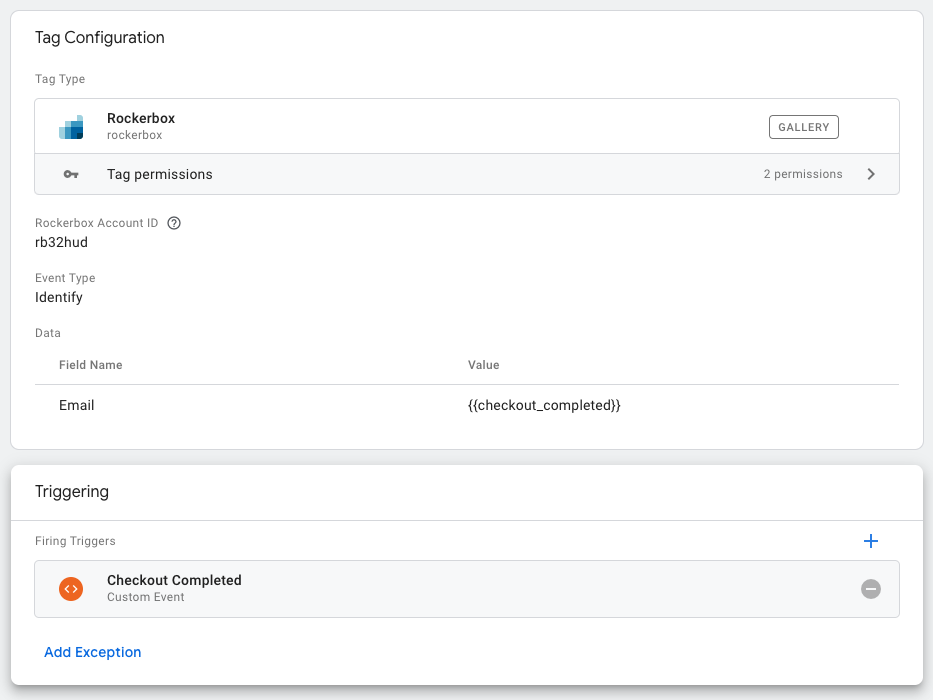
- Update the Event Type to Identify
- Under the Data section, click Add Field and select Email, as well as the corresponding GTM Variable for email created above.
- Select the custom Checkout Completed trigger for this pixel to fire. Final configuration should look like the below
- Give your tag a name, hit save, and publish live.
- Reach out to support@rockerbox.com to QA your implementation
Please reach out to support@rockerbox.com should you have any questions with implementation!