Customizing Reports
You are able to customize Rockerbox reports to both add or remove schema based on your specific use case.
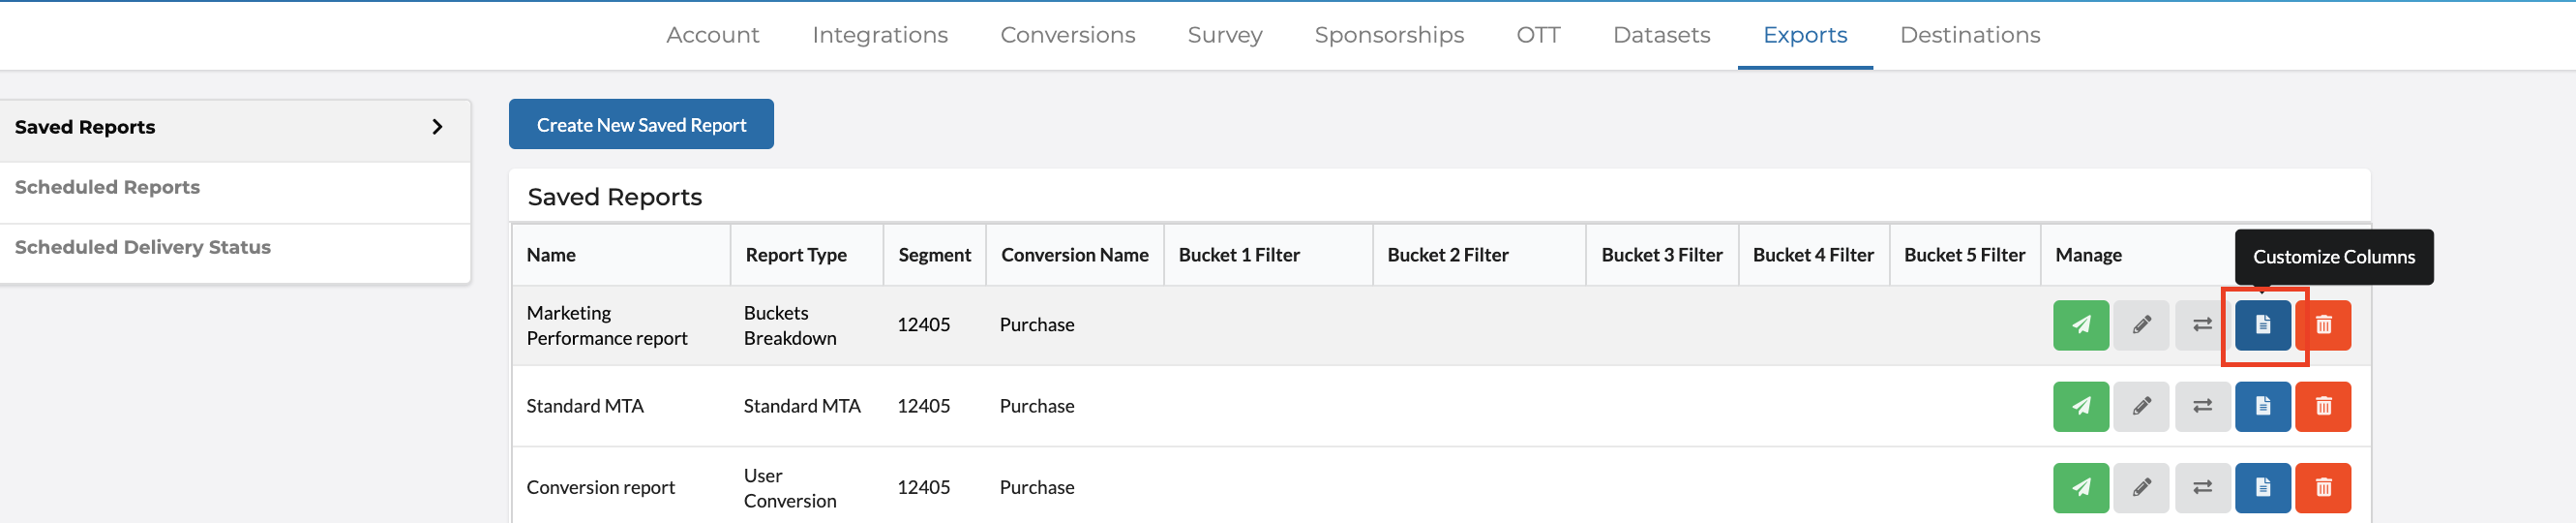
How to customize Rockerbox reporting
- Go to Settings -> Exports in the Rockerbox platform
- Click on the blue document icon next to the report you want to customize
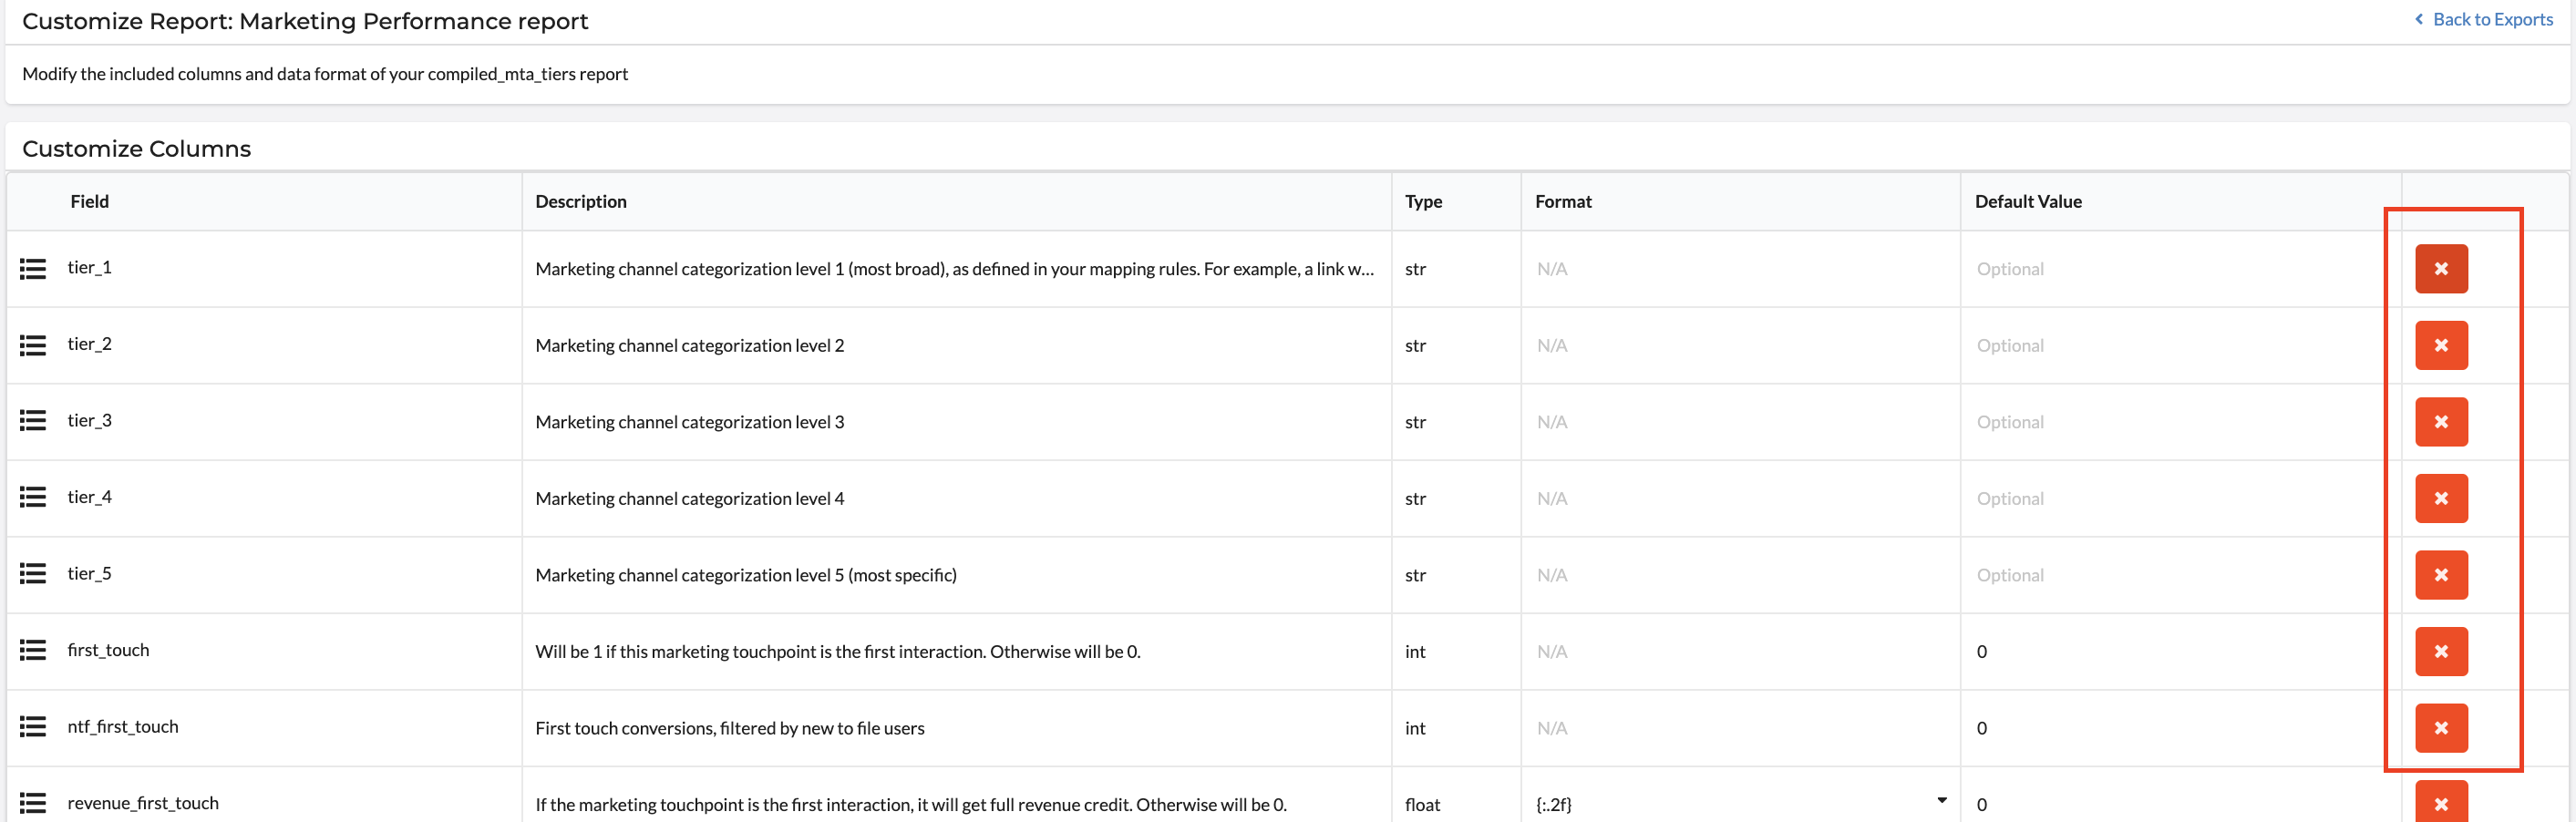
Deleting values from a report
To delete schema from report - you may want to do this to make your reporting smaller and more manageable to work within excel
Click on red “X” next to the schema you do not want in your report
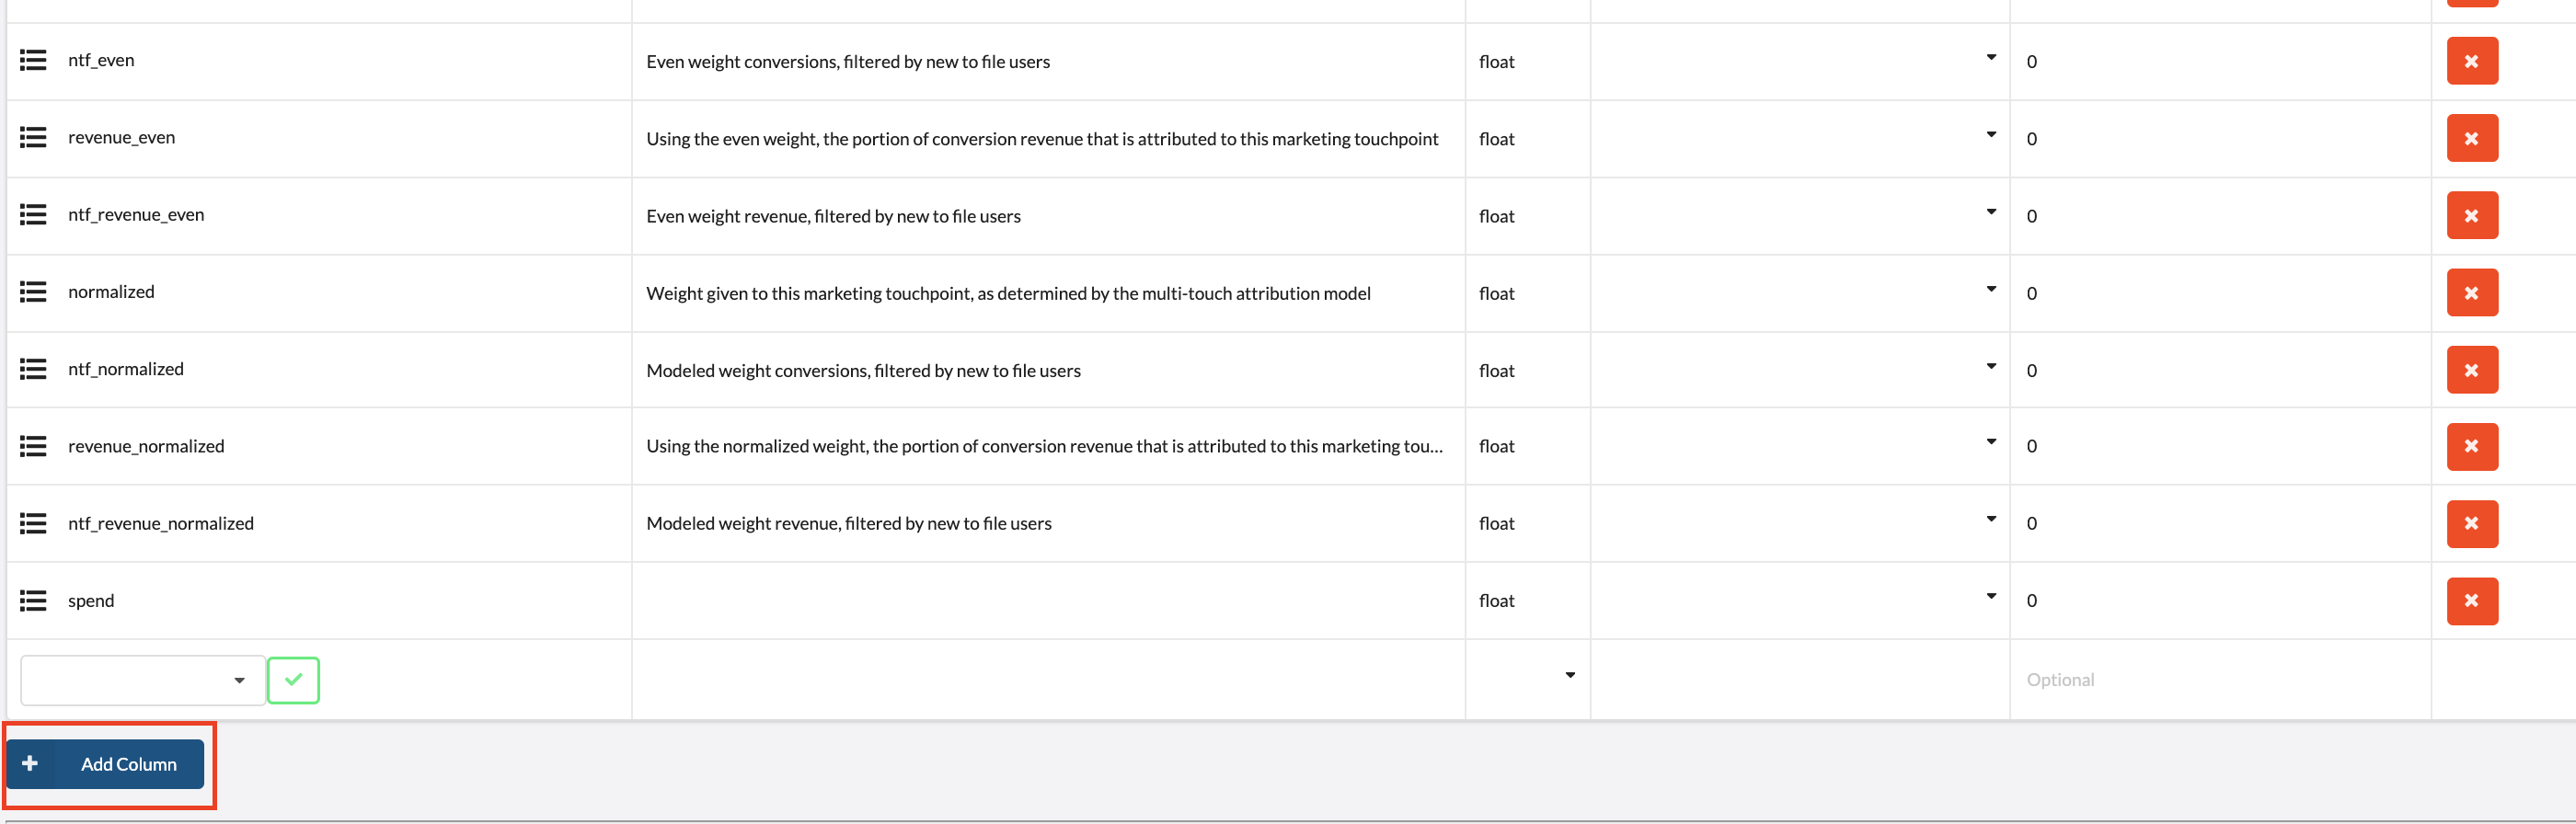
Adding new values into a report
**To add in a new value to report **
Note: To add in a custom field you MUST be passing this as a field in your pixel, webhook, or batch data
- Select “Add Column” at the bottom of the page and select the value you want to add to your report
- Choose the value type i.e. integer, float, string, or JSON (Ask your Rockerbox team if you need help with this part)
- Click on the green arrow to select
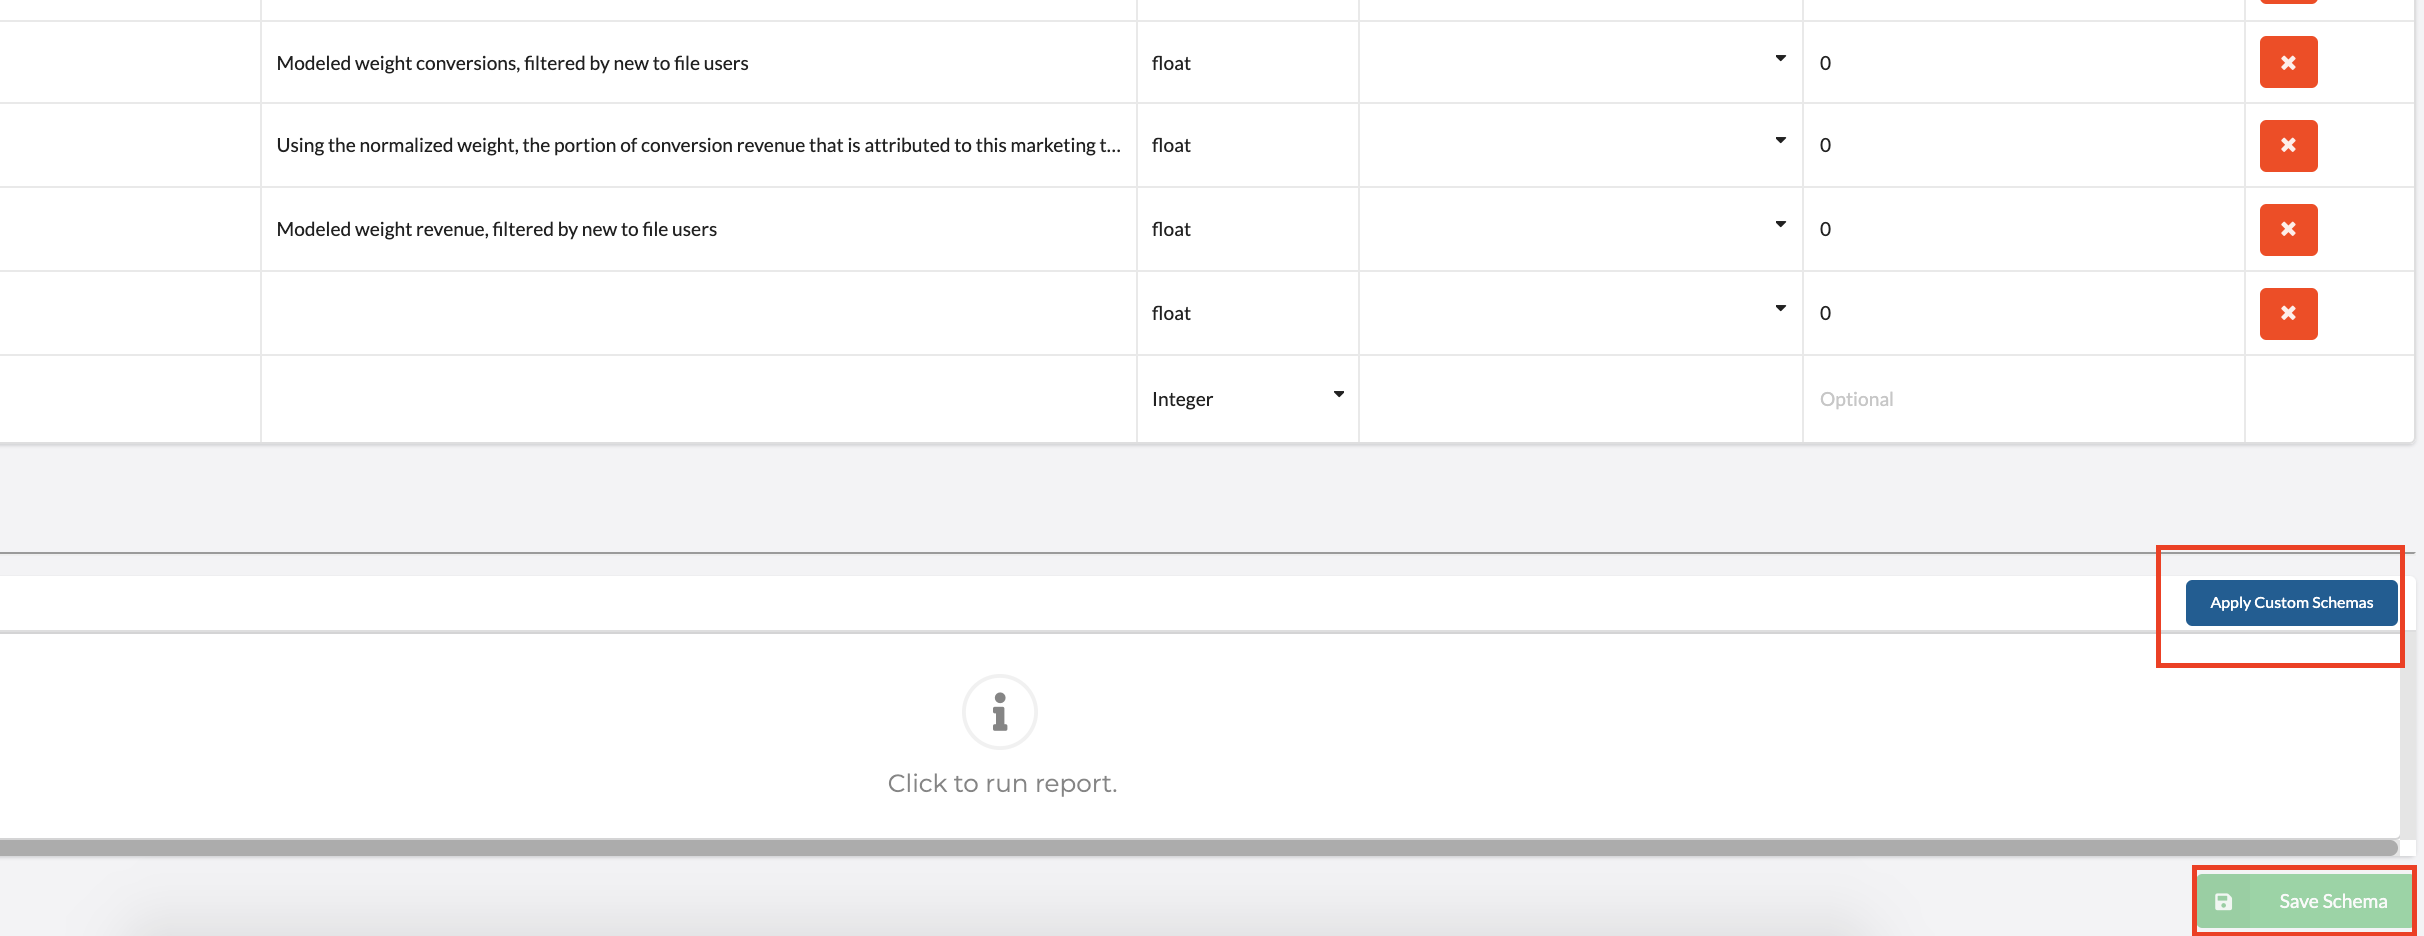
Saving your changes
Once you have deleted or added desired values you need to 1) Apply the Custom Schema 2) Save Schema
Custom date ranges and filters
If you would like to create a custom report that includes more than 1 day of data or create a filtered report that only includes data for a specific channel - reach out to your Rockerbox team for assistance.
If you would like to create a custom report that includes more than 1 day of data or create a filtered report that only includes data for a specific channel - reach out to your Rockerbox team for assistance.